Entry 07 — Revamping the Enemy
When I wasn’t fighting a cold this week, I made some headway on improving the Enemy’s components and overall structure.
Progress on the Enemy Script
This week I’ve started to work on my new enemy script, or scripts I should say. I have given the enemy an “EnemyController” script, think of it as the hub of all of the enemy’s functions. Every other script the enemy uses will require this script first, it houses important variables like health amount, movement speed, etc as well a “Phase” enum. This enum is the most important part of this script, as it will determine what phase the enemy is in, allowing the enemy to act appropriately in different contexts.
At the moment, our enemy has six Phases:
- PATROL
- VIGIL
- HALT
- INVESTIGATE
- ALERT
- DECEASED
When the enemy is created at the start of the game, it is automatically set to the PATROL phase if we have already given it a patrol route in the editor, if not, it is set to the VIGIL phase, where it will keep watch at its starting position. This allows us the freedom of having some enemies patrol while others stand guard. An enemy will enter the HALT phase (which I am currently working on) if they are disturbed by something suspicious (hearing a sound, seeing something in the distance). In the HALT phase, they turn to face the direction of the disturbance and then they enter the INVESTIGATE phase, where they will move in to check the area the disturbance came from. If they find nothing, they will return to either their PATROL or their place of VIGIL. If they were to discover the player at the disturbance area however, they would go into their ALERT phase, where they will attack the player and/or attract the attention of any other nearby guards. If the player eliminates the enemy, they will of course go into their DECEASED phase. In this phase, they will likely just play their death animation and either lay on the ground or de-spawn. We’ll see how we want to go about that later on.
I’m still not happy with the way the enemy rotates towards the disturbance area. It seems that when the disturbance is far from the enemy, they rotate towards it just fine. When it’s closer, the enemy won’t rotate all the way. I still haven’t worked out a solution for this and, in the interest of time, I may implement a distance check and use “transform.LookAt()” for when the disturbance is close to the enemy. This will have the enemy snap to disturbances in an instant if they are close by. It’s not what I want, but I will likely implement it this way for the time being so that I can get the other phases working in time for our demo on the 6th of December.
The existing “Patrol” is now dependent on this EnemyController, and it works well in tandem with it. I also have a new “EnemyMovement” script which also relies on the enemy controller and uses its movement variables (moveSpeed, etc.). This script will handle all of the enemy’s movement when it’s not on a PATROL or VIGIL. It has three “Movement Phases” currently, they are WALK, RUN and ROTATE.
Miscellaneous
Early on in the week, Adrian and I worked on getting FMOD (SFX software) functioning on our project. We were successful in getting sounds to play in-game with FMOD. The only drawback is that FMOD needs a .fspro (FMOD project) file to reference in order for the sounds to play. For the sake of ease, we’ve decided to each store the project file in “C:\temp” so that we wouldn’t need to change the project path in the Unity editor every time. Unfortunately, since we can’t commit an FMOD project to GitHub, Adrian will have to give his project file to me whenever he updates it. It’s a pain, but at least we’ve confirmed that the sounds play in-game just fine as long as we have the file referenced.
For testing purposes I’ve added a new “Dev Cam” script to the main camera in my Unity scene. This allows the camera to be moved freely through the scene using the keyboard and mouse. The controls are identical to those in the game Half-Life, in NOCLIP mode. The camera has its own flashlight attached, and you can fix or unfix its position freely. This has no doubt proven useful as it has enabled me to spot issues in the level or to better observe what the test enemy is doing. It will also help myself and Adrian test out FMOD’s “3D Sound” functionality which allows sound effects to only be heard within a certain distance of the camera/player.
Dev Cam controls: W - Forward A - Left S - Backward D - Right Left CTRL - Descend Space - Ascend Left Shift - Sprint F - Turn dev cam flashlight on/off V - Fix/un-fix camera
Aside from that, I’m also adding invisible colliders to the scene that will determine where SFX will play in the level. At the moment, I’m thinking of the best way to approach designating certain floors as “snow” or “rock” so that the appropriate footstep SFX is played when the player or an enemy steps on them. An example of an SFX collider is this Wind Whistle Zone I’ve added here:
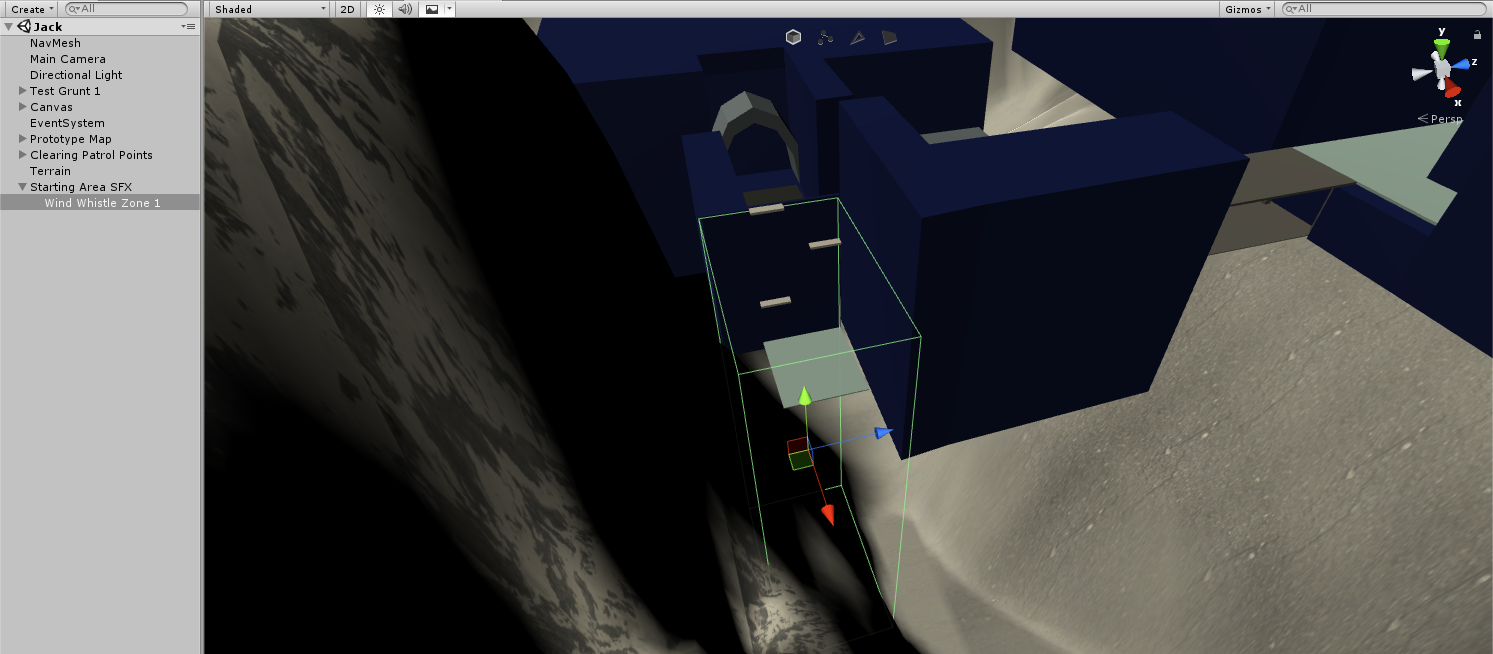 If the player is within this green box outline, they should hear the wind whistling as you might if you were scaling a mountain.
That’s it for this week I think. It’ll soon be time for our demo. Wish us good fortune and good progress this week!
‘Til next time.